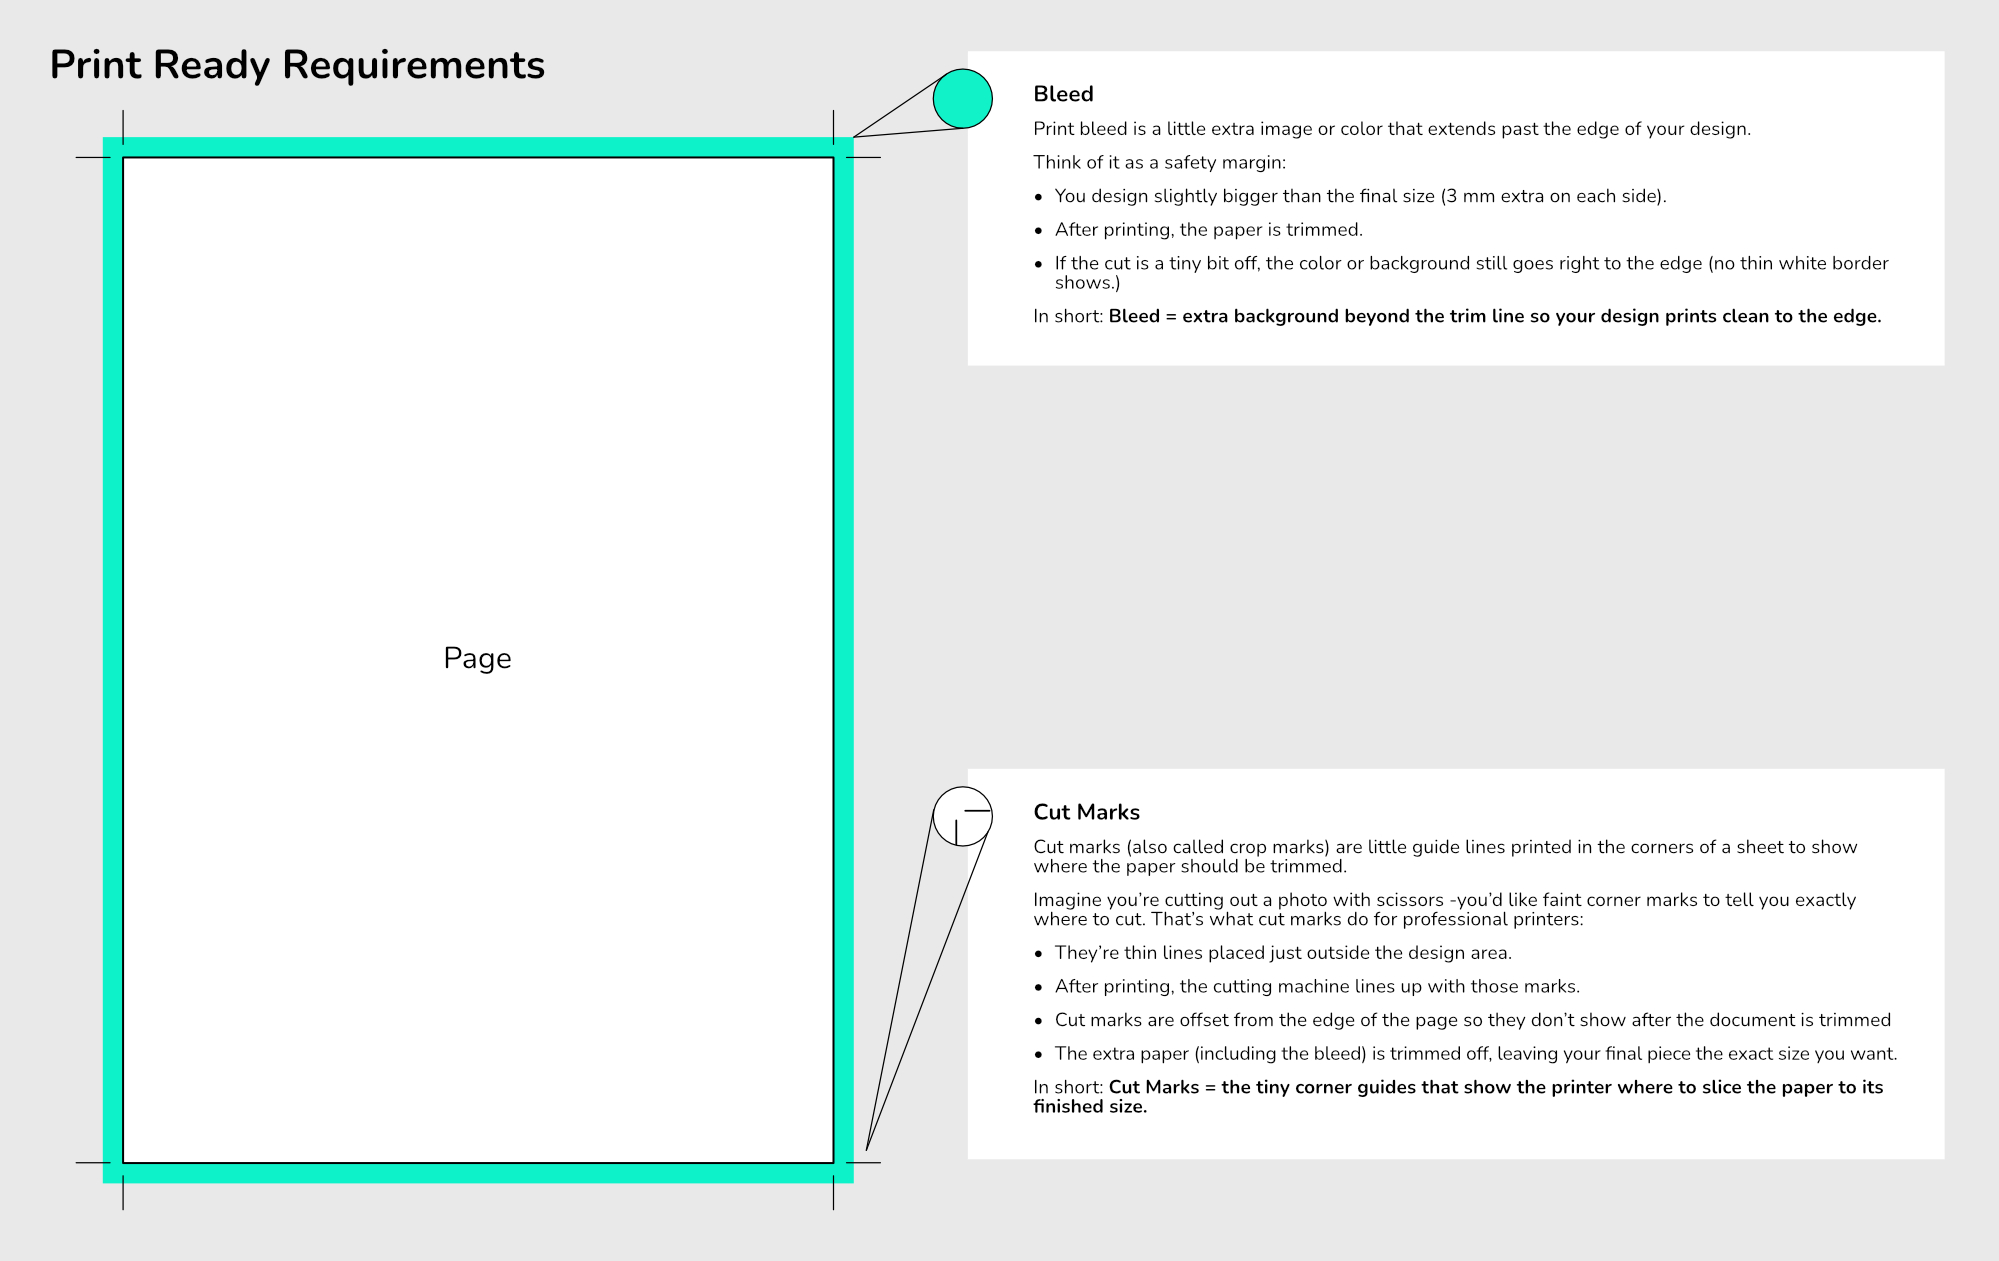
Have you ever tried to print right up to the edge of the page on a home printer? If so, you’ve probably noticed you’re left with a white border because the printer can’t print to the very edge of a piece of paper. This is exactly the same for professional production printers.
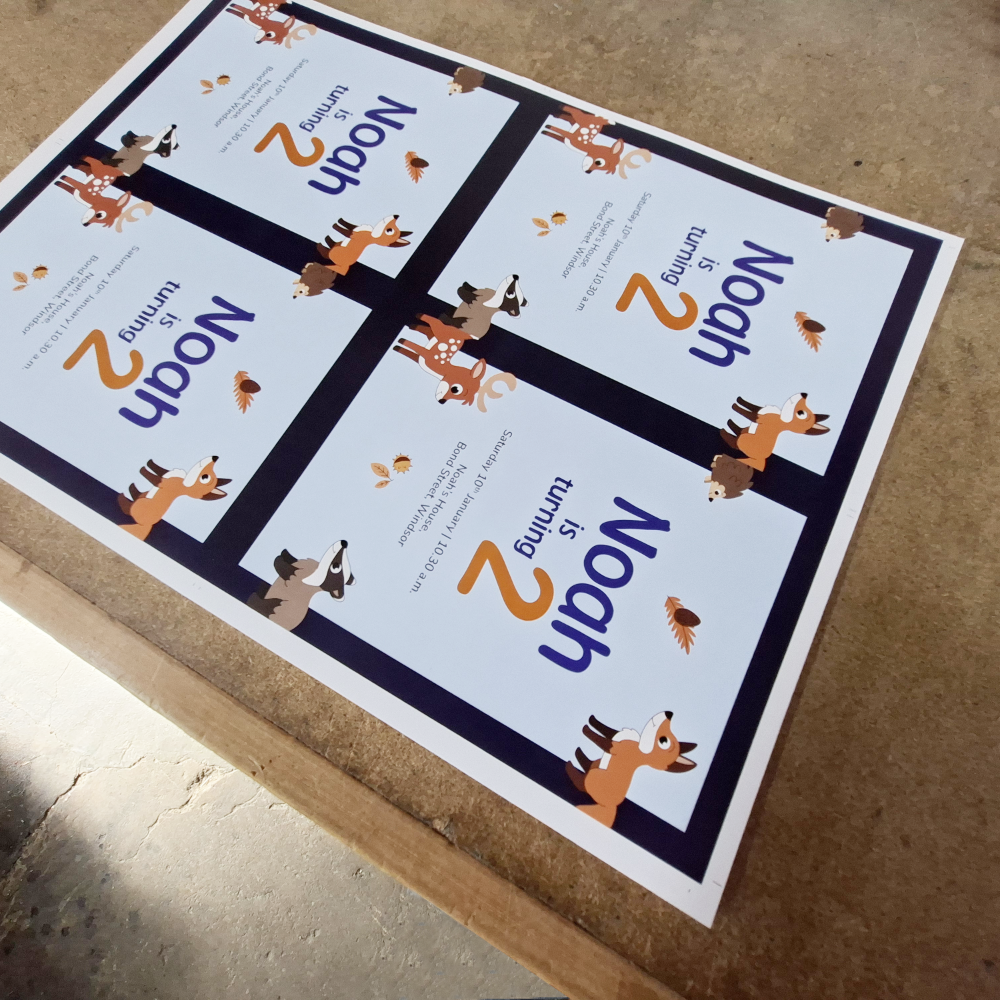
A printer will gang the same design onto an oversized sheet and then trim it down.
A professional printer remedies this problem by printing on a sheet of paper larger than the final size and then trimming it down to the correct dimensions (In fact, they will often gang multiple copies onto the same sheet for efficiency purposes).
This causes a potential problem. When a design is printed and trimmed to its final size, the cutting blade can shift slightly. If your background colour or image stops exactly at the edge of the finished piece, even a tiny shift can leave an unwanted white border.
Bleedsolves this problem.
Bleed is a small extension of your artwork (we require bleed of 3 mm on each side) beyond the final trim size. By letting colours, patterns, or photos run past the cut line, you ensure that the finished print looks clean and edge-to-edge, even if the trim isn’t perfectly exact.
This is a real world example of what bleed looks like on a printed sheet. Notice the image extends past the cut marks.
This example displays how the bleed gets trimmed from a design. This technique stops us from getting any white edges at the edge of the finished print.
Bleed is normally combined with ‘Cut Marks’ which tell the printer where to cut the design.
Adding bleed may feel like a minor step, but it’s the key to a professional, polished print every time.