When you print something – like a flyer, photo, or poster – a printer doesn’t use the same colours your phone or computer screen does. Screens display colour with light using the RGB model (red, green, blue). Printers, on the other hand, put coloured ink on paper. That’s where CMYK comes in.
CMYK stands for Cyan, Magenta, Yellow, and Key (Black). These four inks are mixed in different amounts to create the wide range of colours you see in a printed image. Black is called “Key” because it adds depth and detail that the other three colours can’t fully achieve on their own.
Why not just print in RGB? Because RGB is meant for glowing screens, not ink. If you send an RGB file to a printer, the printer has to convert it to CMYK first. This can cause some colours to shift or look duller.
This is why we would recommend that you design and save your files in CMYK from the start to help your printed piece look closer to what you see on screen.
In short, CMYK is the language of printers – using it means your colours will be more accurate, vibrant, and ready for the real world on paper.
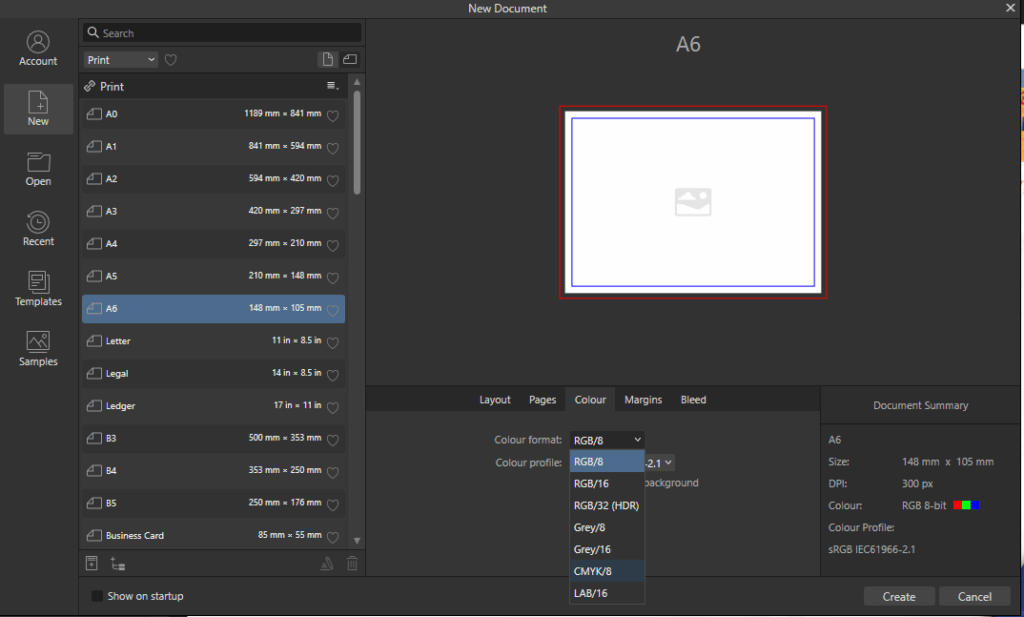
How do I setup my file in CMYK?
When creating a new design, set the document’s colour mode to CMYK (also known as Process Colours). This ensures a more accurate preview of how the design will appear in print compared to leaving the colour format in RGB.
When exporting your design to PDF, use the industry-standard preset PDF/X-1a:2001. This automatically converts the file to a CMYK-safe color space. Note: If your design includes transparency, ensure the compatibility is set to Acrobat 5 or higher.
When you setup your document, make sure the colour format is set to CMYK