Microsoft Word is designed as a word processor which means it isn’t the ideal tool to use for professional printing. However, with careful setup, it can be used to create simple print-ready documents like flyers, posters, and booklets.
Step 1: Set the Correct Page Size
Before you begin designing, choose the correct page size for your project.
We always recommend you start with the right dimensions because this helps avoid resizing issues later.
To do this:
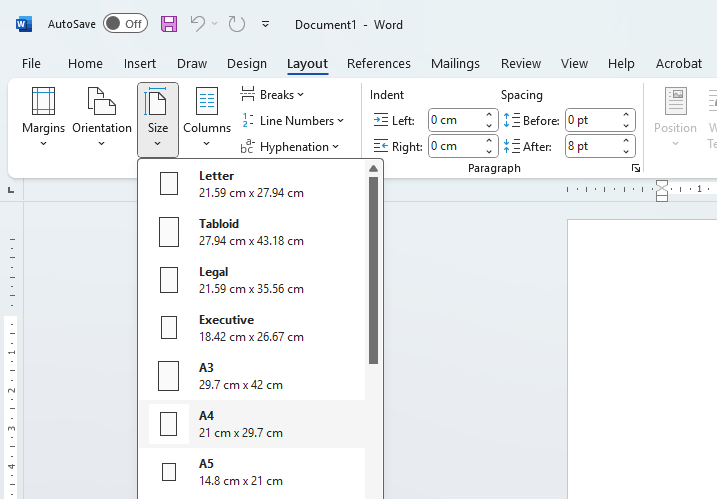
select the tab at the top of the page called ‘Layout’
click ‘Size’ and choose the document size you require
If you have already designed your project at the incorrect size, it may be easier to contact us to see if we can resize your document for you, because changing size at this point often causes lots of layout problems.
Under the Layout Tab select Size and then the size you require.
This example displays how the bleed gets trimmed from a design. This technique stops us from getting any white edges at the edge of the finished print.
If any of your design runs up to the edge of the page you will need to add “bleed”. Bleed is used to prevent white borders after trimming (for more information on Bleed go to our dedicated page: What is Bleed and Why do I need it?).
While Word doesn’t support “true bleed”, we can simulate it by creating wider margins and then extending backgrounds or images into these margins. We require 3mm of bleed.
To do this:
go to the tab LAYOUT
select SIZE and then MORE PAPER SIZES
Now increase the width and height of your document by 6mm (3mm on each side equals 6mm)
Click OK
This has now created a custom sized document with an additional 3mm bleed around each edge
Step 3: Check Your Safe Area
It’s really important that you move any text or important information away from the edge of the page so that it doesn’t get trimmed.
All text should be 3mm away from the edge of the page, (although if you couldn’t add bleed earlier you might want to increase this to 6mm)
If you want to see more detailed information about what Safe Area is and why it is important, see our dedicated page here
Safe area refers to anywhere on the page that is more than 3mm away from the edge of the page. Any text or important information left outside this safe area is in danger of being trimmed.
Step 4: Use High-Resolution Images
For the best results, use images at 300 DPI (dots per inch). Low-resolution images may appear fine on screen but will look blurry or pixelated in print.
A great way to check your image quality is to zoom in and see if they become pixelated. This is a particularly important step because Microsoft Word compresses (makes them into a smaller file size by lowing the quality) images to make the file size smaller. Therefore, the better your original images are the more chance you have that they will print well.
Step 4: Export as PDF
Always export your final document as a PDF before sending it to print. PDFs preserve formatting, fonts, and images, making them much more reliable than sending a Word file.