Canva is a popular online design portal that is often adopted because it is perceived to be free to use. However, its worth noting that some key features for preparing print-ready designs are only available with Canva Pro.
Therfore this guide provides step-by-step instructions for creating print-ready artwork in Canva outlining recommended approaches for both the free and Pro (paid) versions.
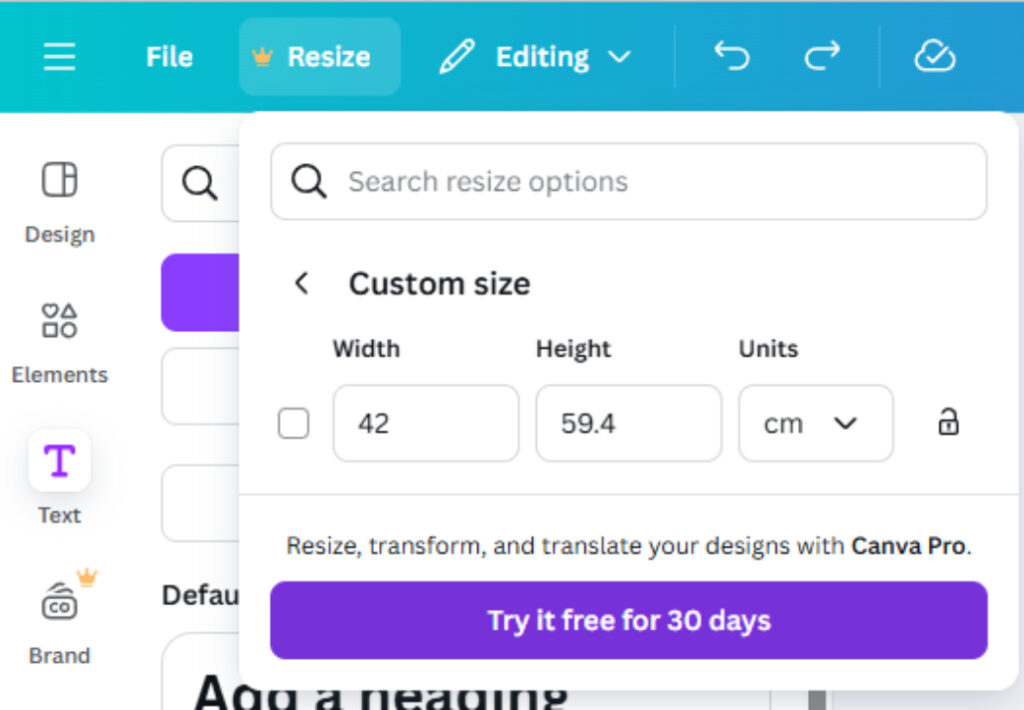
Step 1: Set the Size
The first step to printing any document is to check it is set to the correct size.*
* NOTE: If you do not have Canva Pro you will be unable to complete this step. Instead, you may need to ask your printer to resize it for you when you send them the file.
To resize the document select Resize → Resize → Custom Size Then input the correct size and width of your document.
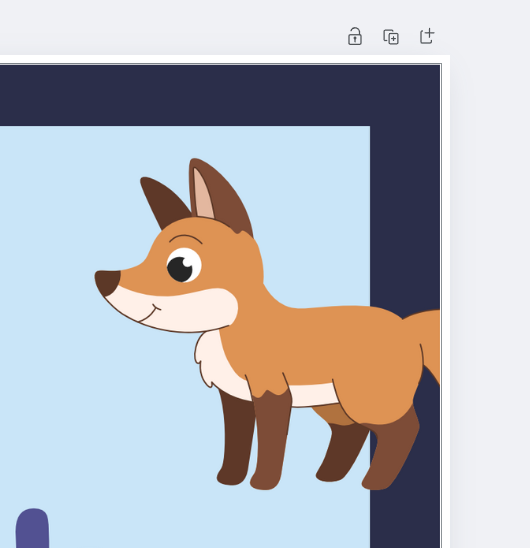
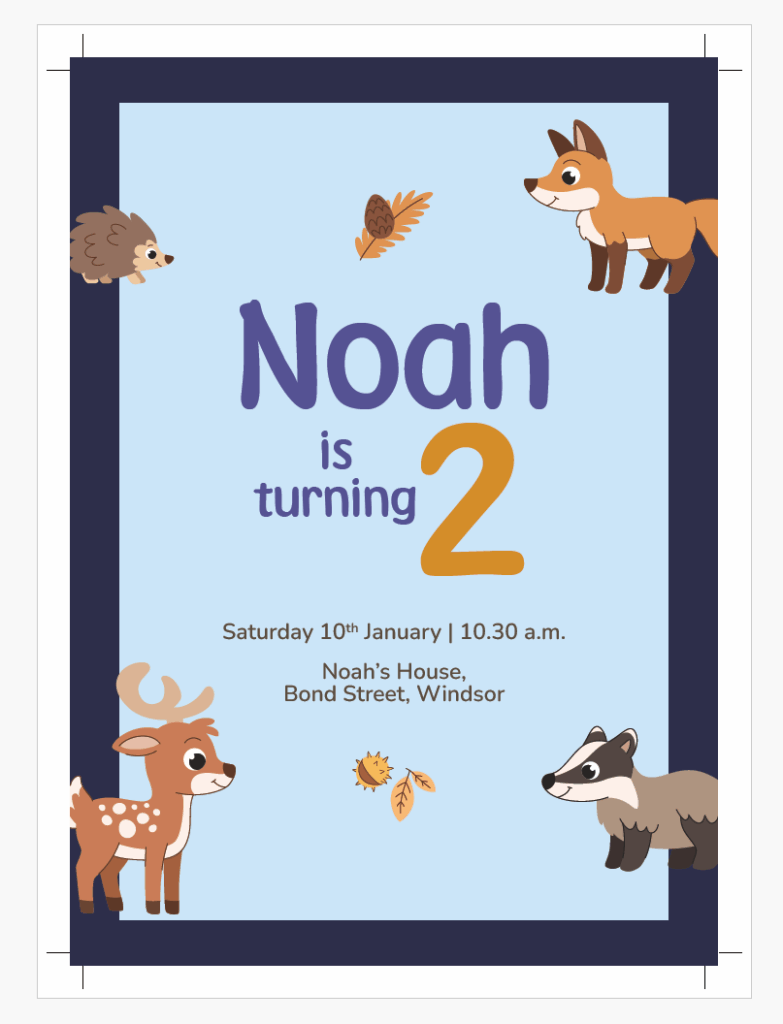
This is an example of a design that would need bleed. Notice how the animals and the border touch the edge of the page. We will need to provide bleed (also called 'overprint') which will then be trimmed by the printer.
By default, Canva does not display bleed area so we need to turn this setting on. You can do this by selecting: File → Settings → ‘Show Print Bleed’..
You should now see a ‘bleed’ area appear outside the edge of your page.
Next you will need to manually drag your image into this area. This needs to be done for every part of the image that reaches to the edge of the page.
Can you see the white bleed area which has been left empty. This is incorrect. You need to extend your image into this white area.
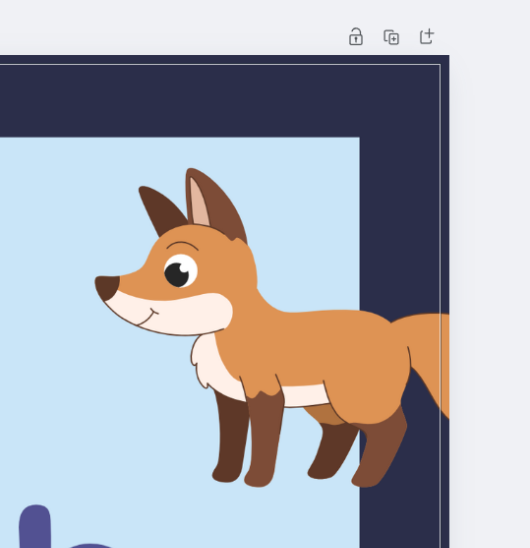
This example now shows bleed correctly applied. The design now flows into the bleed area beyond the page's edge.
Check all the way round your page edge. Every image touching the edge of the page must continue into the bleed area or you risk white appearing at the edge of your design when it is printed.
Once you have completed this step your file is ready to print. The next step is to correctly download our file and include this bleed. This requires us to select the right download settings.
Step 3: Setup File for Download
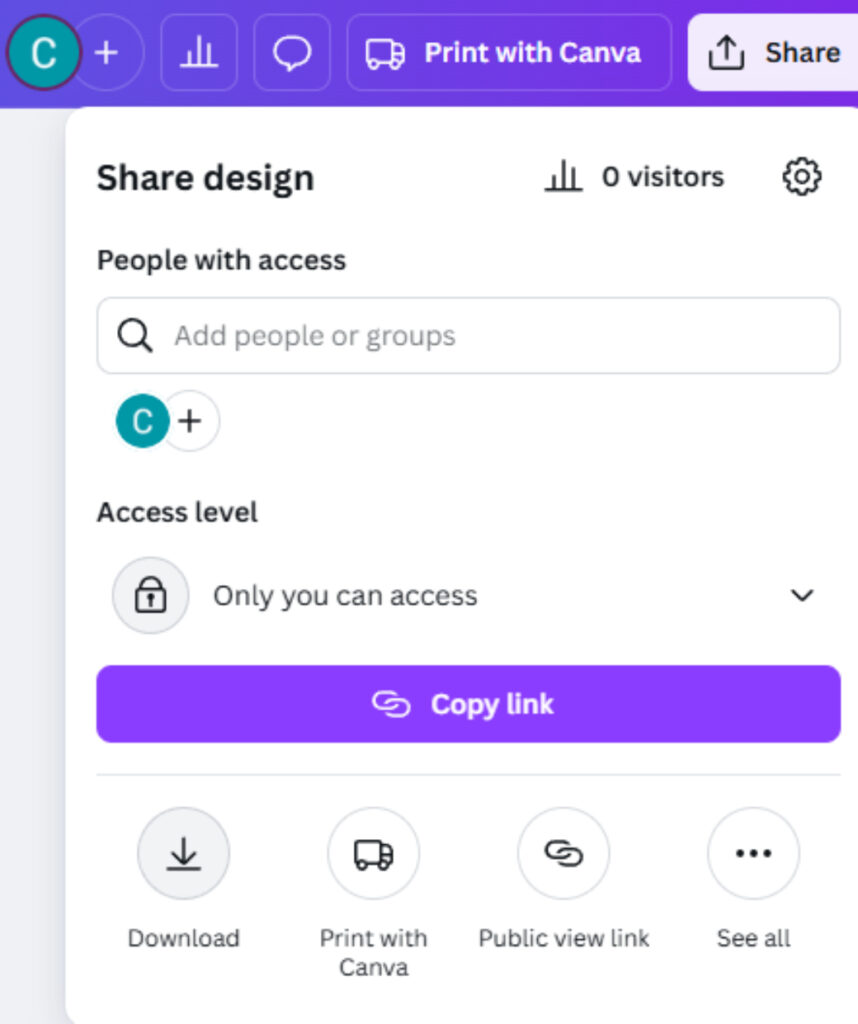
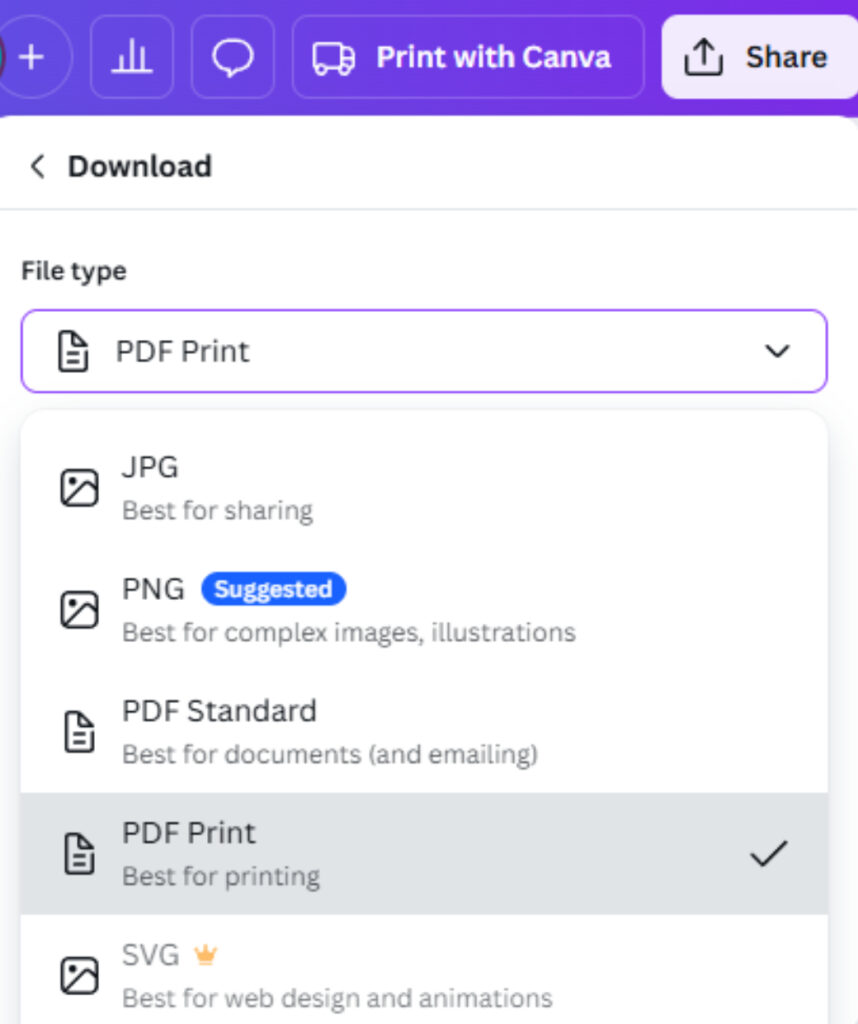
To download the file for print, first click on the ‘Share’ button in the top right hand corner.
Now we need to click on the ‘Download’ button.
It’s important at this point to change the file type in the drop down box to PDF print.
Click the share button and then select Download
From the file type you should choose PDF Print for best results
Next tick the boxes for ‘Crop marks and bleed’ and ‘Flatten PDF’. This will mean the PDF will include the bleed we added before and the cut marks will allow the printer to know where to cut the document when they trim it down.
For best results, the colour profile should be changed from RGB (Red, Green, Blue) to CMYK (Cyan, Magenta, Yellow, Black).** (for more information see: CMYK: What it is and Why it is used)
** If you don’t have Canva Pro you will not be able to do this step. Note that most printers will convert your file to CMYK themselves, but this step will allow for the most accurate colour results.
It is preferable to use CMYK, as it is specifically intended for print production. While RGB can be used, the color conversion may not reproduce as accurately in the final print.
Step 4: Download and Email
Now your ready to click the Download button. Your file will download (It should now have cut marks at each corner and bleed).
This file is now ready to send to us for print.
Notice the design now has cut marks (used by the printer to cut out the design) and bleed all the way round the edge of the page